

How We Build a Souris River Canoe
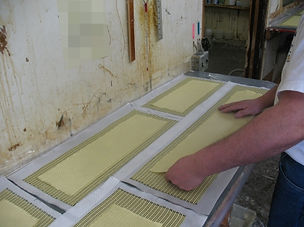
There are five main steps to building a Souris River Canoe. First, four layers of specially chosen fabric are laid-up into a cleaned and prepared mould. Keith Robinson has worked closely with our KEVLAR® suppliers to develop materials and weaves unique to Souris River. Our Woven Colour, and leTigre layups are the result of this ongoing research and development.
If you’re around Atikokan sometime (perhaps you’re paddling Quetico Park this summer), drop by our facility. We’d love to show you around.
Each mould is carefully prepared to ensure a clean, smooth finish on your canoe.

Each layer of fabric is painstakingly smoothed-out to ensure a clean look.

Four layers of fabric are laid-up to provide an ideal blend of weight and strength, and a stunning look.
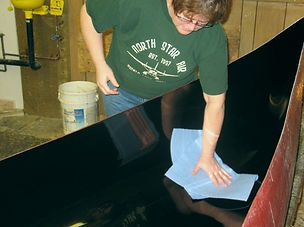
Second, Epoxy resin is applied to the cloth using our proprietary Resin Evacuation System Technology. RES Technology ensures a consistent canoe shell that is both light and durable.

Unfortunately, we can’t show you our proprietary RES Technology.
After the resin has begun to cure, ribs and floats are carefully marked-out and installed. Foam ribs covered with several layers of specially selected material ensure a hull that is firm enough to retain its shape, yet flexible enough to slide over rocks and obstructions. Innovations like this make Souris River Canoes the best design for wilderness tripping.

The sides of the canoe are carefully trimmed.

Our flotation tanks are filled with foam. Many of our competitors use air-filled floats. It’s an added safety feature we hope you won’t need.

The foam inserts for our ribs, like most of our fittings, are fabricated in-house to ensure quality and consistency.

Ribs are measured and glued to the hull.
Just like our hulls, our ribs are made of four layers of specially chosen fabric to ensure a lightweight combination of strength and flexibility.
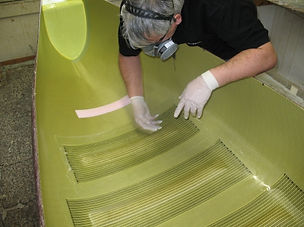
Wetting-out the ribs is a craft.
Each shell is cured overnight in an oven. After curing, the completed shells are moved into the Assembly Room for final construction. Here the gunwales, endcaps, seats and other fittings are carefully installed.

Grommets are a feature not found on many of our competitors’ canoes. (Hulls from most other manufacturers are not strong enough to hold the grommets).
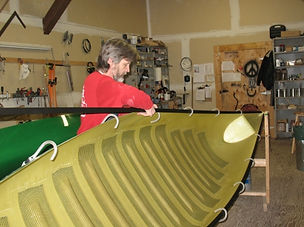
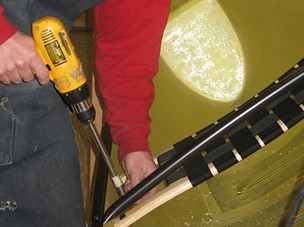
Our aluminum gunwales are of a heavier gauge than many of our competitors, helping to strengthen the canoe. (The canoe shown here has extended ribs, a feature popular for outfitters).

Our thwarts, fabricated in-house, are slightly curved to add strength. This is a feature you won’t find in the competition.
Each seat is measured and cut for that canoe, ensuring a perfect fit every time.

In the last step before inspection, the decals are placed on the canoe.

Finally, each canoe is inspected for quality control purposes. No canoe leaves our shop until it is good enough for you.